The minutes before you hit “send” on an email campaign are when list hygiene matters most. A disciplined pre-send process catches the problems — dead addresses, duplicates, suppressed contacts, formatting errors — that would otherwise damage deliverability and waste the campaign. This article lays out a ten-step pre-send hygiene methodology you can apply before every major send.
The ten-step methodology
Pre-send hygiene is a sequence of checks and cleanups run on a mailing list before deployment. Done consistently, it protects sender reputation and maximizes the campaign’s reach. The ten steps, in order:
1. Deduplicate. Remove duplicate records so no one receives multiple copies and your counts are accurate.
2. Validate email syntax. Catch malformed addresses (missing @, invalid characters) before they bounce.
3. Verify domains. Confirm the email domains exist and accept mail.
4. Remove role accounts. Strip generic addresses (info@, sales@, admin@) that hurt engagement and deliverability.
5. Apply suppression lists. Remove opt-outs, prior complainers, and do-not-contact records.
6. Check against known bounces. Remove addresses that hard-bounced previously.
7. Screen for spam traps. Use validation tools to flag likely trap addresses.
8. Standardize formatting. Normalize fields used in personalization so merge tags render correctly.
9. Segment-verify. Confirm the list matches the intended segment criteria.
10. Seed and test. Send to seed addresses across major providers to confirm deliverability and rendering before the full send.
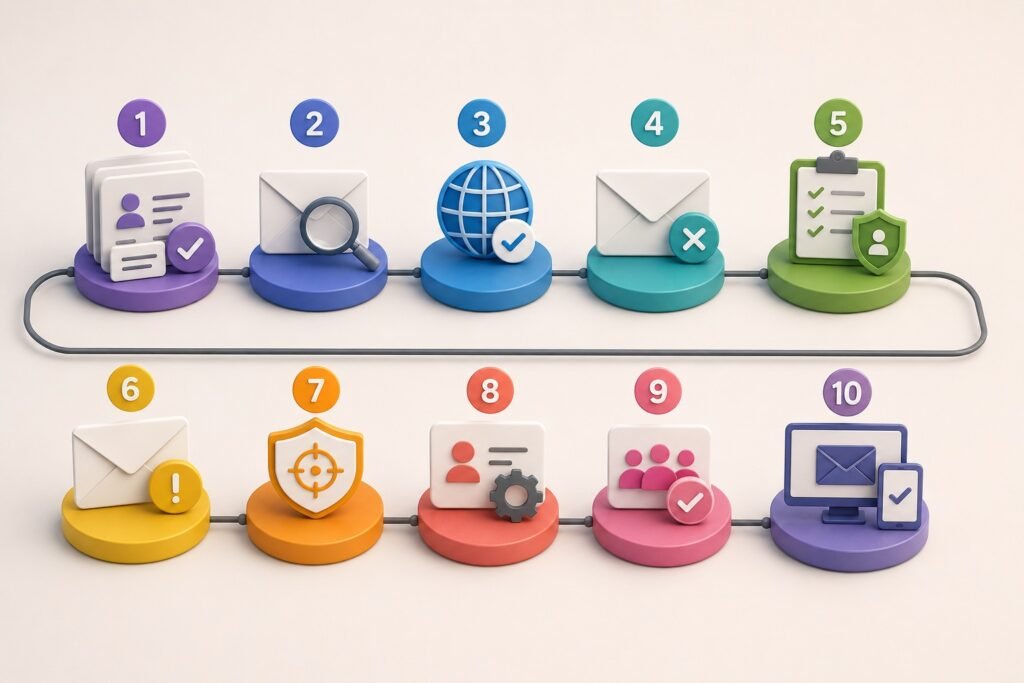
Each step removes a category of risk. Skipping steps to save time is the false economy that produces bounced sends, spam-folder placement, and reputation damage — far more costly than the hygiene would have been.
Common questions
What is pre-send list hygiene?
Pre-send list hygiene is the process of reviewing, cleaning, validating, and segmenting a contact list before launching an email campaign. The goal is to reduce invalid addresses, duplicates, irrelevant contacts, outdated records, and compliance risks before messages are sent. A good process also checks whether the list matches the campaign’s audience and whether the data is suitable for the intended use.
Step 1: How should you confirm the source of the email list?
Document where every segment of the list came from and how the contacts were collected or obtained. Identify whether records came from inbound forms, existing CRM data, events, enrichment, purchased data, partners, or another source. Source documentation helps determine whether the contacts are appropriate for the campaign and whether any restrictions apply to their use.
Step 2: How should you remove duplicate contacts?
Match records using identifiers such as email address, contact ID, company domain, and other relevant fields. Keep the most complete and current record when duplicates exist, while preserving useful CRM history. Deduplication prevents the same person from receiving multiple messages and makes campaign reporting more reliable.
Step 3: How should you validate email addresses?
Use an appropriate email-validation process to identify invalid, malformed, undeliverable, disposable, or otherwise risky addresses. Validation should happen close enough to the send date to provide useful information because addresses can become invalid over time. Avoid treating an email verification result as proof that the contact is still the correct person or an appropriate marketing recipient.
Step 4: How should you remove suppressed contacts?
Compare the campaign list against all applicable suppression records before sending. This can include unsubscribes, previous opt-outs, hard bounces, complaints, internal do-not-contact records, and other exclusion lists. Suppression should be treated as a mandatory pre-send check rather than an optional cleanup step.
Step 5: How should you identify outdated B2B contacts?
Review fields that frequently change, particularly employment status, company affiliation, job title, email address, and phone number. Flag contacts whose information cannot be reasonably confirmed or whose records have become stale. For important campaigns, prioritize re-verification of high-value contacts rather than assuming that an old CRM record is still accurate.
Step 6: How should you check whether contacts actually fit the campaign?
Apply the campaign’s qualification criteria before sending. Review company size, industry, geography, job function, seniority, account status, and any other attributes that define the intended audience. Removing irrelevant contacts can improve campaign performance and reduce complaints, even when their email addresses are technically valid.
Step 7: How should you check the list for risky or low-quality addresses?
Identify addresses that may create delivery problems or provide little commercial value, such as obvious role accounts, disposable addresses, generic aliases, or addresses with questionable provenance. Whether a particular address should be excluded depends on the campaign and business model. The key is to distinguish
deliverable from
useful and appropriate.
Step 8: How should you check the list for compliance before sending?
Review the applicable email-marketing, privacy, and data-use requirements for the recipients and jurisdictions involved. Confirm that suppression requests are respected and that the campaign has the required identification, disclosures, and opt-out mechanism. For regulated or sensitive audiences, additional requirements may apply. Data being technically deliverable does not automatically mean it is appropriate or lawful to email.
Step 9: How should you segment the cleaned list before sending?
Separate contacts into meaningful groups based on characteristics such as customer status, industry, job role, geography, engagement, account tier, or campaign intent. Segmentation allows businesses to tailor messaging and control sending volume. It also makes it easier to identify unusual bounce, complaint, or engagement patterns within individual segments instead of hiding them inside an overall campaign metric.
Step 10: What should you verify immediately before sending?
Run a final pre-send check covering
duplicates, invalid addresses, suppressions, bounces, stale records, audience fit, segmentation, compliance requirements, personalization fields, and sending configuration. Test the campaign with internal addresses and verify that unsubscribe mechanisms work correctly. Save a snapshot of the final audience so you can determine exactly which records were included if delivery, complaint, or compliance issues arise later.
How this applies to your business
Build the ten steps into a repeatable pre-send pipeline rather than treating hygiene as an ad-hoc pre-launch scramble. Automate steps 1 through 8 so they run on every list consistently, and add human review of seed-test results and segment verification before the final send. Consistency is what protects you — a pipeline that runs every time catches the problems that occasional, rushed hygiene misses.
Never skip suppression and validation to save time. Suppression protects you legally (sending to opt-outs violates CAN-SPAM); validation and bounce-removal protect you technically (dead addresses damage sender reputation). These are the steps where skipping causes the most expensive damage — the few minutes saved aren’t worth a compliance violation or a reputation hit that suppresses all your email for weeks.
Treat seed testing as non-negotiable for significant sends. Confirming inbox placement and rendering on a controlled seed list before the full deployment catches problems while they’re cheap to fix. Finding a deliverability or rendering issue across 20 test addresses is a minor adjustment; finding it after sending to your full audience is a wasted campaign and a reputation cost.
Iscope Digital’s
Database Marketing Solutions include pre-send list hygiene as standard, and our
Email Marketing service runs the full validation, suppression, and seed-testing pipeline before every deployment. For the suppression discipline at the center of step 5, see
Suppression lists explained, and for the ongoing hygiene that keeps your master list healthy between sends,
CRM hygiene: how often should you clean your database?